Difference between revisions of "Microbit-Piano"
From SB-Components Wiki
| (One intermediate revision by the same user not shown) | |||
| Line 44: | Line 44: | ||
* Take Micro:bit and stack it on the Micro:Bit Piano’s edge connector as shown. | * Take Micro:bit and stack it on the Micro:Bit Piano’s edge connector as shown. | ||
| + | [[File:Microbit_Piano.png]] | ||
* To start a new project development using Micro:Bit Piano, kindly visit https://makecode.microbit.org/# | * To start a new project development using Micro:Bit Piano, kindly visit https://makecode.microbit.org/# | ||
* Start a new project by clicking on <b>New Project</b> tab, It will Open a Programming and Simulation Interface where you can write code , connect board and program it in 1 click. | * Start a new project by clicking on <b>New Project</b> tab, It will Open a Programming and Simulation Interface where you can write code , connect board and program it in 1 click. | ||
| Line 57: | Line 58: | ||
<li> Now you can use MicrobitPiano Extension drag and drop blocks to play piano as shown in below example and download it to your Micro:Bit and Touch buttons of Piano to play sound.</li> </br> | <li> Now you can use MicrobitPiano Extension drag and drop blocks to play piano as shown in below example and download it to your Micro:Bit and Touch buttons of Piano to play sound.</li> </br> | ||
[[File:Microbit_Piano_example.PNG | 1000 px]] | [[File:Microbit_Piano_example.PNG | 1000 px]] | ||
| − | |||
| − | |||
Latest revision as of 06:56, 28 January 2022
Micro:Bit Piano
Micro:bit Piano is a piano module that runs on Micro:bit from which you can play beautiful songs. There is an interface for you to connect to your Micro:bit, four RGB LEDs make your board brilliant. This piano module has a capacitive touch chip that prompts 13 contact keys to simulate your piano keys, you can play your preferred music.
Features
- Micro:bit edge connector, directly pluggable.
- Buzzer to play music.
- Onboard capacitive touch controller, 13x touch keys through the I2C interface.
- 4x RGB LEDs, controlled by only one signal pin.
- Breakout module control pins, Micro:bit SPI pins, and GPIO pins
- Easy Expansion
Specifications
- Touch controller: TTP229
- RGB LED: WS2812B
- LED color depth: 16777216 colors
- Operating voltage: 3.3V

Buy it From : Click Here
Pinout
| PIN | Description |
|---|---|
| VCC | 3.3V |
| GND | GND |
| Buzzer | PIN 0 of Microbit |
| WS2812 RGB LED | PIN 1 of Microbit |
Programming
Drag and Drop
Many people want to learn the process to learn more about micro:bit by getting an understanding of the potential of micro:bit. If one wants to run MicroBit Piano then they can do the following steps.
- Take Micro:bit and stack it on the Micro:Bit Piano’s edge connector as shown.
- To start a new project development using Micro:Bit Piano, kindly visit https://makecode.microbit.org/#
- Start a new project by clicking on New Project tab, It will Open a Programming and Simulation Interface where you can write code , connect board and program it in 1 click.
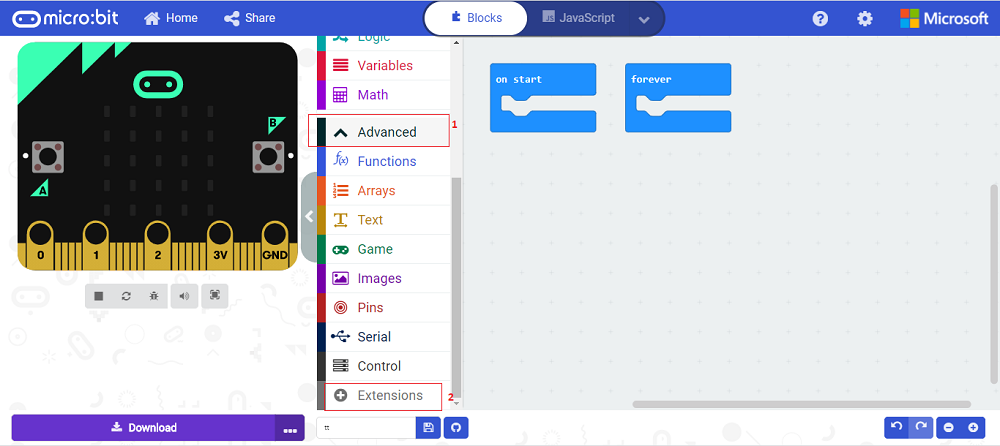
- A user needs to add an extension for Micro:Bit Piano via clicking on the tab Advanced >> Extensions and enter the mentioned URL below in search box.
https://github.com/sbcshop/MicroBit-Piano

- Click on Search button after entering above URL, Now look for the search result to add the extension to the project(current). Click on Search result to install it.
- It will install two libraries "MicrobitPiano" and "Neopixel" as shown.


