Difference between revisions of "Pi-Finger"
From SB-Components Wiki
| Line 78: | Line 78: | ||
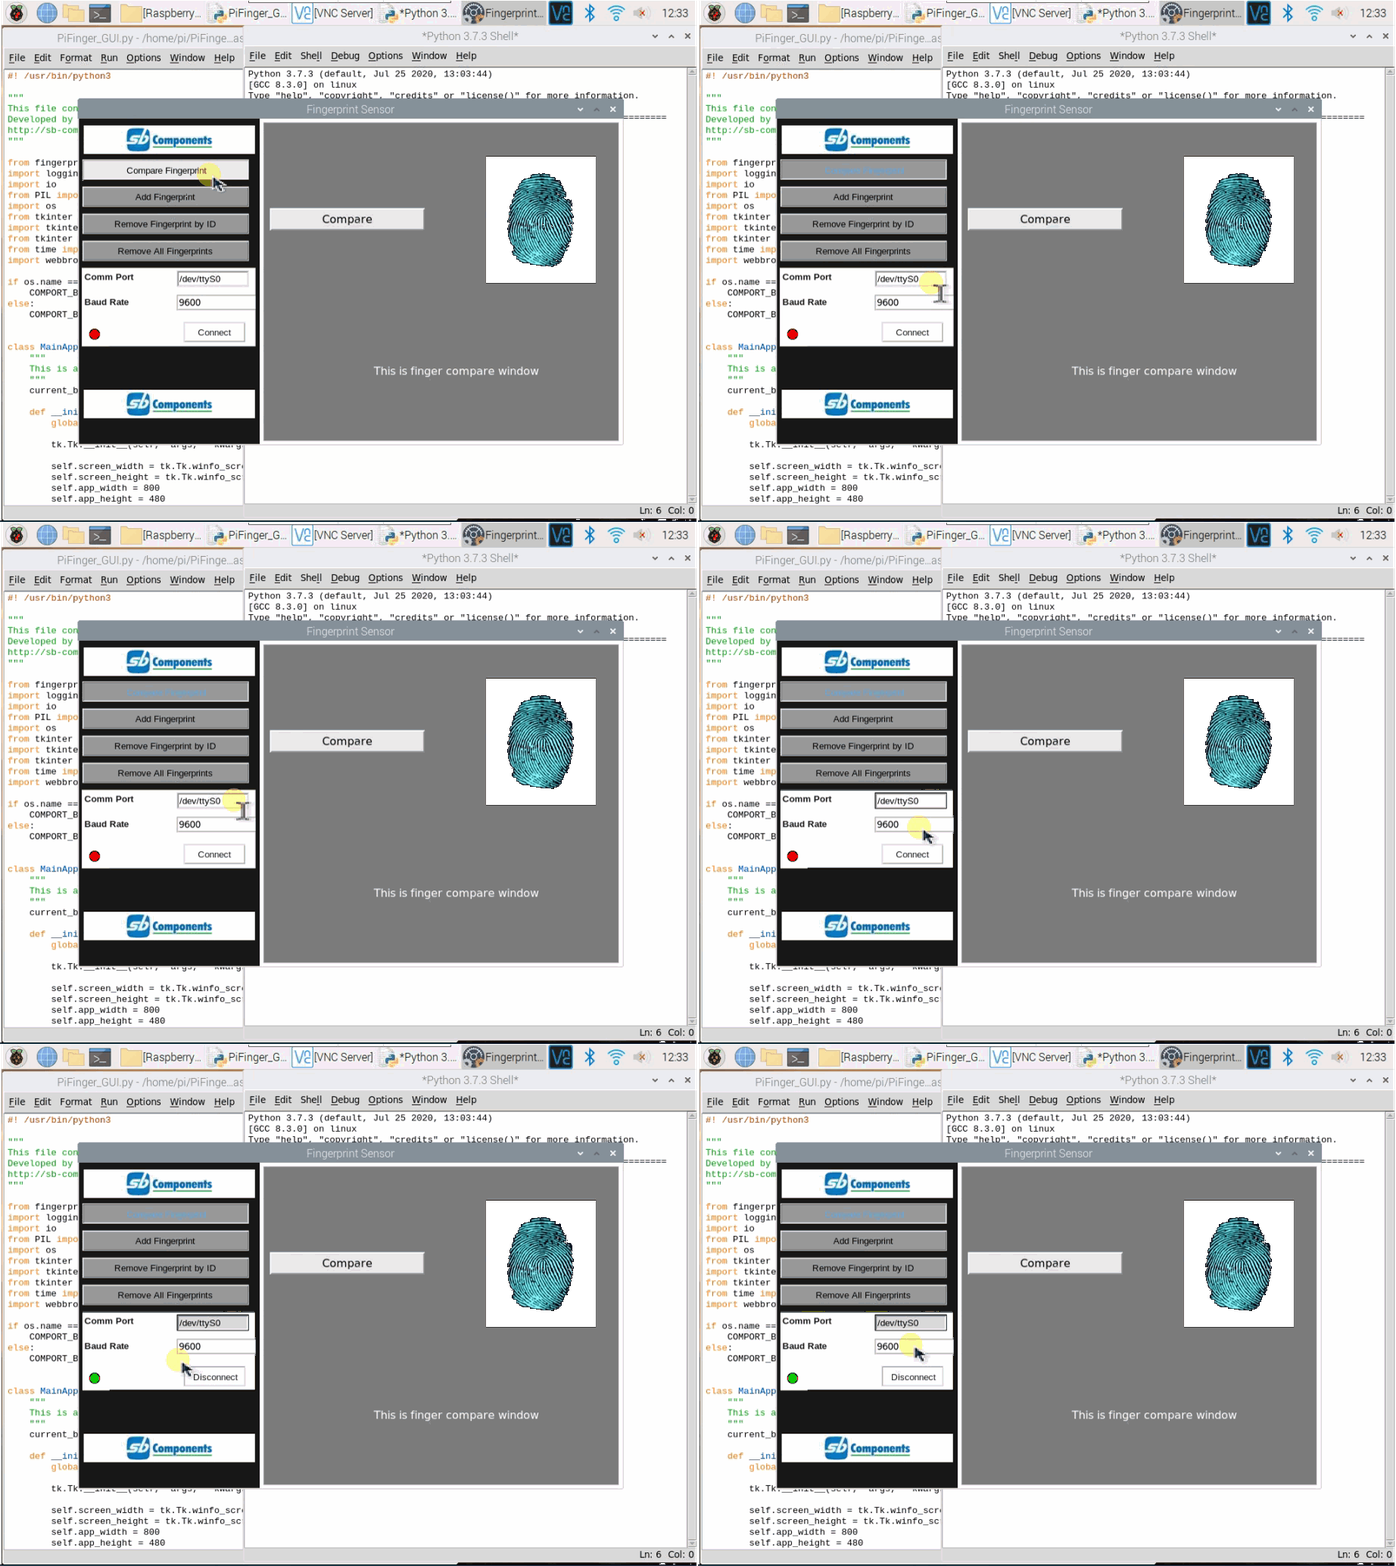
Select COM port and Baud Rate ( default is 9600) from the above GUI ("/dev/ttyS0" in case of default connection), and click on connect button to start communication with the fingerprint sensor. | Select COM port and Baud Rate ( default is 9600) from the above GUI ("/dev/ttyS0" in case of default connection), and click on connect button to start communication with the fingerprint sensor. | ||
| − | https://raw.githubusercontent.com/sbcshop/PiFinger/main/Images/pifinger_connect_pi.gif | + | <img src="https://raw.githubusercontent.com/sbcshop/PiFinger/main/Images/pifinger_connect_pi.gif" height="600" width="600" /> |
== Resources == | == Resources == | ||
Revision as of 05:18, 23 June 2021
Pi-FInger
nents. PiFinger, the first-ever Fingerprint HAT for Raspberry Pi Comprise of onboard Nuvoton MCU with an on-chip crypto-accelerator, Cortex-M23 TrustZone, and XOM facilities. A user can use the communication protocol to the PiFinger with commands over the UART protocol with the Baud rate 115200 bps or USB 2.0 full speed.
Features
- Capacitive Contact Technology
- On Chip-Crypto Accelerator
- High-Speed UART Interface
- Register up to 24 Fingerprints
- Nuvoton MCU
- Cortex-M23 Trust zone
Specifications
- Processor - Nuvoton MCU Cortex M23
- Communication - UART, USB 2.0 and GPIO
- Display - 0.91” OLED (SSD1306)
- Buzzer - Yes
- Default Baud Rate - 9600 bps
- Matching Mode - 1:1,1:N

Buy it From : Click Here
Pinout
| PiFinger | Raspberry Pi |
|---|---|
| VCC | 5V |
| GND | GND |
| Fingerprint TX | GPIO15 (RXD) |
| Fingerprint RX | GPIO14 (TXD) |
| OLED SDA | GPIO2 (SDA) |
| OLED SCL | GPIO3 (SCL) |
| BUZZER | GPIO13 |
Installation
Python
Required Hardware
- Raspberry Pi x 1
- Pi-Finger x 1
Enable I2C and Serial Interface
- Open a terminal and run the following commands to enable I2C:
sudo raspi-config
Choose Interfacing Options -> I2C ->yes
- Again run below command to enable Serial
sudo raspi-config
Choose Interfacing Options -> Serial -> No -> Yes
- You can also enable Serial and I2C using Graphical method, Open Menu by clicking on Raspberry Pi icon >> Preferences >> Raspberry Pi Configurations >> Interfaces , and select below option.
- Now reboot your pi by running the below command :
sudo reboot
Board Test
- Connect PiFinger on top of 40 pins stackable GPIO header of Raspberry Pi.
- Now Clone/Download PiFinger Repository by running below command or directly download from Github.
git clone https://github.com/sbcshop/PiFinger.git
- Open cloned/downloaded folder and choose your environment type (i.e: Raspberry Pi or Windows)
For Raspberry Pi
- Run PiFinger GUI by running the below command:
python3 PiFinger_GUI.py or using any python3 supported ide.
Select COM port and Baud Rate ( default is 9600) from the above GUI ("/dev/ttyS0" in case of default connection), and click on connect button to start communication with the fingerprint sensor.

Resources
Github
Datasheet

