Difference between revisions of "Pi-Finger"
From SB-Components Wiki
| Line 88: | Line 88: | ||
===== GUI Features ===== | ===== GUI Features ===== | ||
| − | * Compare Fingerprint - Option to Compare registered Fingerprint. | + | * '''Compare Fingerprint''' - Option to Compare registered Fingerprint. |
| − | * Add Fingerprint - Add New Fingerprint, will assign an ID for each successful registration. | + | * '''Add Fingerprint''' - Add New Fingerprint, will assign an ID for each successful registration. |
| − | * Remove Fingerprint ( By ID) - Remove registered Fingerprint for a specific ID. | + | * '''Remove Fingerprint''' ( By ID) - Remove registered Fingerprint for a specific ID. |
| − | * Remove All Fingerprint (Registered) - Remove all saved fingerprints in a single click. | + | * '''Remove All Fingerprint''' (Registered) - Remove all saved fingerprints in a single click. |
== Resources == | == Resources == | ||
Latest revision as of 11:43, 23 June 2021
Pi-Finger
PiFinger, the first-ever Fingerprint HAT for Raspberry Pi Comprise of onboard Nuvoton MCU with an on-chip crypto-accelerator, Cortex-M23 TrustZone, and XOM facilities. A user can use the communication protocol to the PiFinger with commands over the UART protocol with the default Baud rate of 9600 bps or USB 2.0 full speed.
Features
- Capacitive Contact Technology
- On Chip-Crypto Accelerator
- High-Speed UART Interface
- Register up to 24 Fingerprints
- Nuvoton MCU
- Cortex-M23 Trust zone
Specifications
- Processor - Nuvoton MCU Cortex M23
- Communication - UART, USB 2.0 and GPIO
- Display - 0.91” OLED (SSD1306)
- Buzzer - Yes
- Default Baud Rate - 9600 bps
- Matching Mode - 1:1,1:N

Buy it From : Click Here
Pinout
| PiFinger | Raspberry Pi |
|---|---|
| VCC | 5V |
| GND | GND |
| Fingerprint TX | GPIO15 (RXD) |
| Fingerprint RX | GPIO14 (TXD) |
| OLED SDA | GPIO2 (SDA) |
| OLED SCL | GPIO3 (SCL) |
| BUZZER | GPIO13 |
Installation
Python
Required Hardware
- Raspberry Pi x 1
- Pi-Finger x 1
Enable I2C and Serial Interface
- Open a terminal and run the following commands to enable I2C:
sudo raspi-config
Choose Interfacing Options -> I2C ->yes
- Again run below command to enable Serial
sudo raspi-config
Choose Interfacing Options -> Serial -> No -> Yes
- You can also enable Serial and I2C using Graphical method, Open Menu by clicking on Raspberry Pi icon >> Preferences >> Raspberry Pi Configurations >> Interfaces , and select below option.

- Now reboot your pi by running the below command :
sudo reboot
Board Test
- Connect PiFinger on top of 40 pins stackable GPIO header of Raspberry Pi.
- Now Clone/Download PiFinger Repository by running below command or directly download from Github.
git clone https://github.com/sbcshop/PiFinger.git
- Open cloned/downloaded folder and choose your environment type (i.e: Raspberry Pi or Windows)
For Raspberry Pi
- Run PiFinger GUI by running the below command:
python3 PiFinger_GUI.py or using any python3 supported ide.
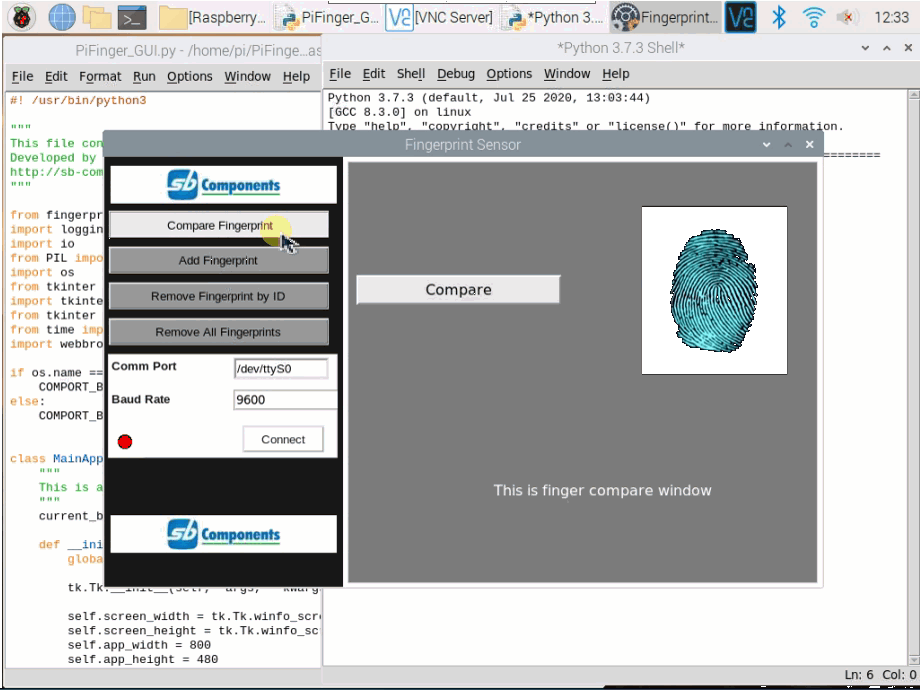
Select COM port and Baud Rate ( default is 9600) from the above GUI ("/dev/ttyS0" in case of default connection), and click on connect button to start communication with the fingerprint sensor.
For Windows
- Run PiFinger GUI by running "PiFinger_GUI.py" file with any python3 supported ide.
- Select COM port and Baud Rate ( default is 9600) from above GUI ("COM7" (check comport from device manager) in case of default connection), and click on connect button to start communication with the fingerprint sensor.
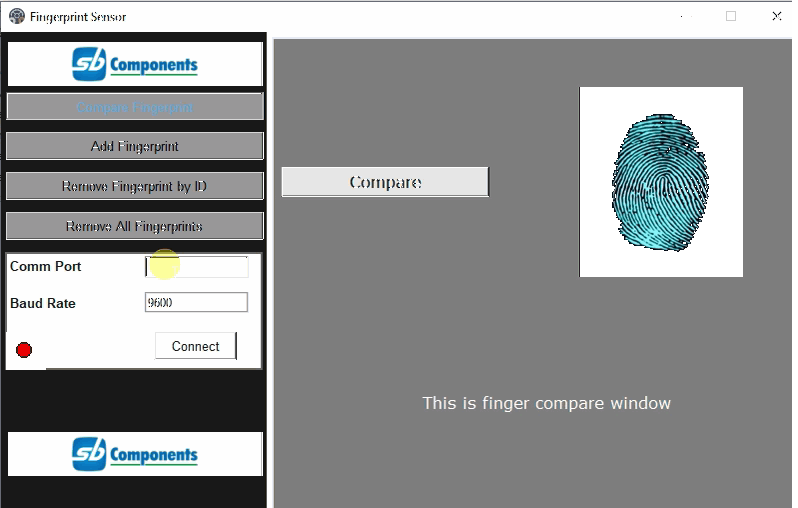
GUI Features
- Compare Fingerprint - Option to Compare registered Fingerprint.
- Add Fingerprint - Add New Fingerprint, will assign an ID for each successful registration.
- Remove Fingerprint ( By ID) - Remove registered Fingerprint for a specific ID.
- Remove All Fingerprint (Registered) - Remove all saved fingerprints in a single click.
Resources
Github