|
|
| Line 29: |
Line 29: |
| | <li> Click on green play button to run example of Pico 3V Relay HAT. </li> | | <li> Click on green play button to run example of Pico 3V Relay HAT. </li> |
| | [[File:Thonny_play.PNG]] | | [[File:Thonny_play.PNG]] |
| | + | |
| | + | == Resources == |
Revision as of 06:58, 14 April 2021
Pico 3V Relay HAT
Pico 3V Relay HAT is a Two-Channel high-quality relay with the Switching Voltage(VAC) up to 2A/ 120V(Max), Switching Voltage(VDC) up to 2A/ 24V(Max), and an operating voltage of 3.3V. It comes with a Female Pin Header, to easily connect with Raspberry Pi Pico via effortless stacking.
Features
Two High-Quality Relays with switching voltage 2A/ 120V(Max), Switching Voltage(VDC) up to 2A/ 24V(Max).
40 Pins Standard Raspberry Pi Pico header.
Stackable design for easy interfacing with Raspberry Pi Pico.
Compatible with Raspberry Pi Pico.
Indication LED for relay on/off status.
Specifications
Channel - 2 CH
Operating Voltage - 3.3V
Switching Voltage (VAC) - 2A/ 120V
Switching Voltage(VDC) - 2A/ 24V
Dimensions - 21mm x 51 mm
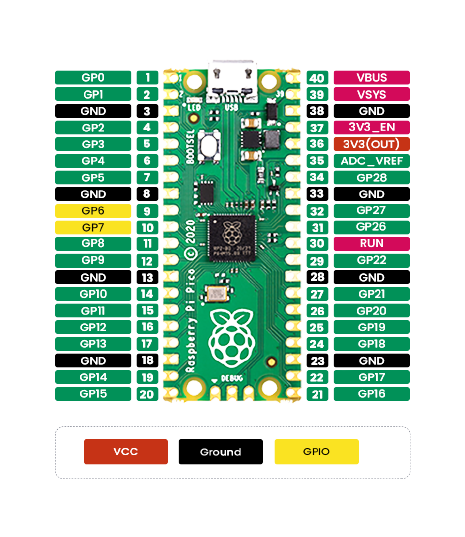
Pinout
Installation
MicroPython
Stack Raspberry Pi Pico on female header of Pico 3V Relay HAT.
Connect USB cable on Raspberry Pi Pico USB port.
Now use example code "test.py" from Pico 3V Relay HAT's github repository in any micropython supported ide (preferred thonny ide).
Source code : https://github.com/sbcshop/Pico-3V-Relay-HAT
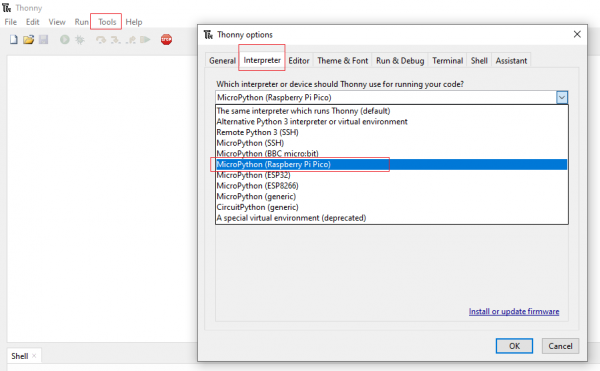
Copy paste code in thonny ide and choose interpreter as MicroPython (Raspberry Pi pico).
Click on green play button to run example of Pico 3V Relay HAT.

Resources


