Pico-wifi-HAT
From SB-Components Wiki
Pico Wi-Fi HAT
Pico Wi-Fi HAT is a compact and easy-to-use Wi-Fi HAT for the Raspberry Pi Pico that includes an ESP8266 module, IEEE 802.11b/g/n Wi-Fi Standard, 3.3 V Operating Voltage, UART Communication interface, and a 40-pin GPIO extension header that can be controlled via AT Command and supports TCP/UDP communication protocol.
Pico Wi-Fi HAT also includes a 1.14-inch display with a resolution of 240 x 135 pixels, 65K RGB colors, and a sharp and vivid exhibiting effect, designed primarily for user engagement via SPI connection by incorporating a GPIO header. The 1.14-inch LCD includes the ST7789 Driver and SPI Interface, decreasing the amount of IO pins required.
It's a simple way to enable Wi-Fi on the Raspberry Pi Pico, making it suitable for a variety of IoT communication projects. It is intended for developers of all skill levels, from the most experienced to those who are just getting started with IoT devices.
Features
- ESP8266 module with four-layers process
- Standard Raspberry Pi Pico 40-pin GPIO extension header
- Supports STA, AP, and STA+AP three Wi-Fi operating modes, embedded LWIP protocol stack, supports TCP/UDP communication
- 2x functional buttons
- Comes with development resources and manual
Specifications
- Operating Voltage - 3.3 V (Internally connected on Pico 3v3 pin)
- Communication - UART Interface
- UART BAUD RATE - 115200 bps
- Wi-Fi Standard - IEEE 802.11b/g/n
- Frequency Range - 2400 ~ 2483.5 MHz
- Wi-Fi Operating Mode - Wi-Fi STA, Wi-Fi AP, Wi-Fi STA+AP
- Protocol - TCP, UDP
- Antenna - PCB Antenna
- Operating Temperature - -40℃ ~ 85℃

Installation
MicroPython
All Pico Wi-Fi HAT comes with preloaded AT firmware, So you can develop and design your projects without updating AT firmware for ESp8266.
TCP Client Example
- Stack Pico Wi-Fi HAT with Raspberry Pi Pico.
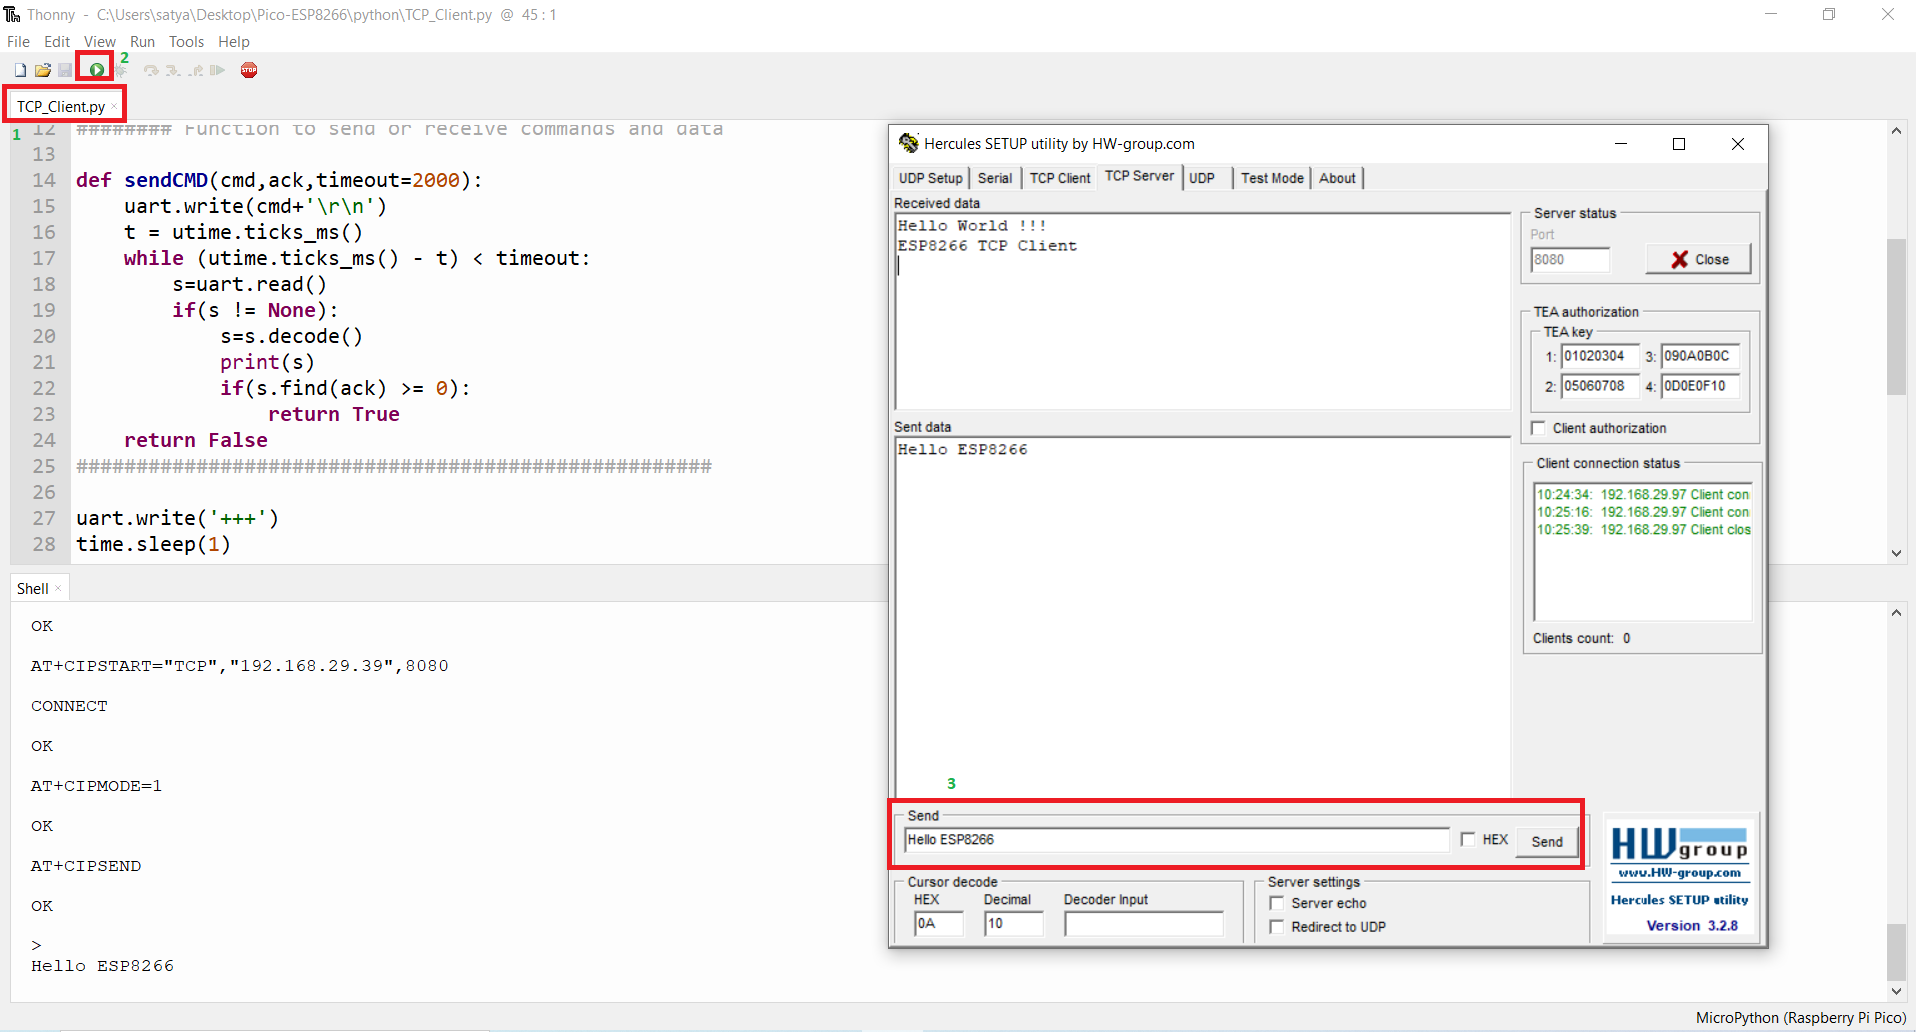
- Now Run Hercules Setup Utility (Download link is available under the Resources section below) and select tab TCP Server, enter port number as 8080 (you can choose any other port as well) and finally click on Listen button to start the TCP server on your PC/Laptop. Note down your PC/Laptop IP address to access your TCP Server.

- Make sure to connect your PC/Laptop and Pico Wi-Fi HAT on the same router. For example: If your Wi-Fi SSID is "TEST" and password is "test1234", then you must connect both devices on the TEST network.
- Now open Wi-Fi_TCP_Client.py in thonny ide (You can find code here: https://github.com/sbcshop/Pico-WiFi-HAT ), Don't forget to change SSID, Password and TCP server IP (Laptop/PC IP on which TCP server is running), Run this file by clicking on the green play button. It will make a connection with TCP_Server and sent a hello message, you can also sent back any message from the server to WiFi HAT.
TCP Server Example
- Stack Pico Wi-Fi HAT with Raspberry Pi Pico.
- Now open WiFi_TCP_Server.py in thonny ide (You can find code here: https://github.com/sbcshop/Pico-WiFi-HAT ), Don't forget to change SSID, Password, Run this file by clicking on the green play button. It will try to connect with entered WiFi SSID, If successful it will print the IP address. Note it down for later use.

- Now Run Hercules Setup Utility (Download link is available under the Resources section below) and select tab TCP Client, Set module IP obtained by running above code and enter port number as 8080 and finally click on connect button. On a successful connection, you can see CONNECT on thonny Shell.

- Now you can send or receive messages from Server to Client or vice versa.
On Board LCD Usage
- All functionality of 1.14" LCD breakout can be used with this board. One can use this 1.14" lCD to display WiFi information, messages, Sensor Data, Weather information etc.
- Please Flash the .uf2 file in Pico for LCD drive.
https://learn.sb-components.co.uk/1.14-lcd-breakout
Resources
- 'Software
- Github